Overview
TalkifAI is built around organizations — every agent, API key, phone number, and call log belongs to an organization. This enables multi-user teams to collaborate on building and managing voice agents. Organization features:- Invite team members
- Role-based access control (Owner / Admin / Member)
- Multiple organizations per user account
- All resources scoped and isolated per organization
- Organization logo and branding
Organization Structure
Organization Creation: A default organization is automatically created when you sign up. You can create additional organizations from the organization switcher in the sidebar.
Roles & Permissions
Role Hierarchy
⚠️ Notes:
- Admins can promote Members to Admin, but cannot change other Admins or the Owner
- Members can only view and use public agents created by others
Role Descriptions
Owner
Full control over the organization. Can manage API keys, organization settings, and all members. One owner per organization.
Admin
Can invite/remove members, manage agents and phone numbers, view all analytics, and promote members to admin. Cannot manage API keys or org settings.
Member
Can create and manage their own private agents. Can view and use public agents. Cannot invite others or manage organizational resources.
Managing Your Organization
Create an Organization
An organization is automatically created when you sign up. You can create additional organizations:- Click your organization name in the top navigation (sidebar)
- Click Create Organization
- Enter:
- Organization name (display name)
- Slug (unique URL identifier, cannot be changed later)
- Click Create
Switch Between Organizations
If you’re a member of multiple organizations:- Click your organization name in the sidebar
- A dropdown shows all organizations you belong to
- Click any organization to switch to it
- All resources (agents, keys, logs) update to reflect the selected organization
Edit Organization Settings
Owners only:- Go to Studio → Organization (or Settings → Organization)
- Update:
- Organization name (display name)
- Organization logo (image upload)
- Click Save Changes
Inviting Team Members
Send an Invitation
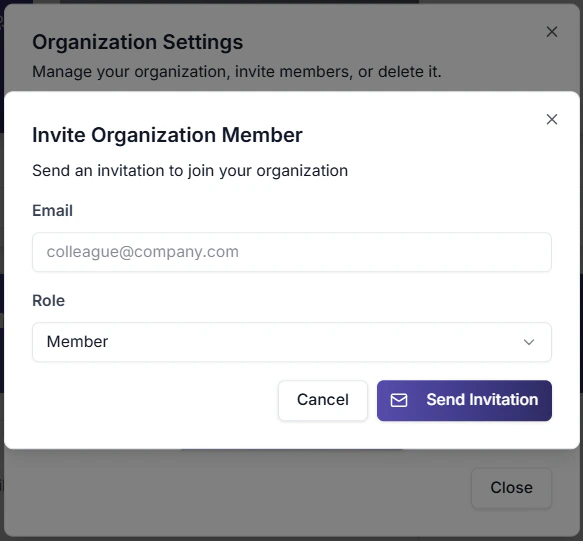
Owners and Admins can invite:- Go to Studio → Organization (or Team page)
- Click Invite Member
- Enter:
- Email address (must be valid)
- Role (Admin or Member)
- Click Send Invitation
- ✅ Expires in 7 days
- ✅ Can be resent from Pending Invitations
- ✅ Can be cancelled before acceptance
Via API (Better Auth)
Resend or Cancel Invitations
- Go to Studio → Organization → Pending Invitations
- Click Resend to resend the invitation email
- Click Cancel to revoke the invitation
Managing Team Members
View All Members
Go to Studio → Organization to see:- All current members with their roles
- Member join dates
- Pending invitations
Change a Member’s Role
Owners only (for changing Admin roles):- Go to Studio → Organization → Members
- Click the ⋯ menu next to a member
- Select Change Role
- Choose new role and confirm
- ✅ Promote Members to Admin
- ❌ Cannot change other Admins
- ❌ Cannot change Owner
- ✅ Promote/Demote any member
Remove a Member
Owners and Admins:- Go to Studio → Organization → Members
- Click the ⋯ menu next to a member
- Select Remove from Organization
- Confirm removal
- ✅ Private agents → remain in org (Owners/Admins can access)
- ✅ Public agents → remain public
- ✅ Commercial agents → remain in marketplace
- ❌ Member loses all access
Agent Visibility Modes
Agents within your organization have three visibility levels:Change Agent Visibility
- Open the agent in Studio
- Go to Settings → Access (or Agent Settings panel)
- Select visibility mode:
- Private — Only you and admins can see
- Public — All organization members can see
- Commercial — Published to marketplace (requires Owner/Admin)
- Save
Commercial mode restriction: Only Owners and Admins can publish agents to the marketplace. Members can create private agents but cannot publish them publicly or commercially.
API Access for Organizations
Organization-Scoped API
All API calls are automatically scoped to your organization when you use your API key. You cannot access another organization’s resources with your key.Get Organization Info
Manage API Keys
Owners only:- Go to Studio → Organization → API Keys
- Configure provider keys:
- OpenAI API Key
- Google (Gemini) API Key
- Deepgram API Key
- Cartesia API Key
- Save changes
- TalkifAI Keys — Use platform-managed keys (billing applies)
- My Keys — Use your own provider keys (no platform markup)
Organization Settings
Logo Upload
Upload a logo for your organization:- Go to Studio → Organization
- Click on the logo placeholder
- Upload an image (PNG, JPG, SVG)
- Crop/adjust as needed
- Save
- Displayed in organization switcher
- Shown in team page header
- Used in email invitations
Troubleshooting
Invitation email not received
Invitation email not received
Check:
- Check spam/junk folder
- Verify the email address was entered correctly
- Resend the invitation from Studio → Organization → Pending Invitations
Member can't see an agent
Member can't see an agent
Problem: A member reports not being able to access an agent.Check:
- Is the agent set to Private? (only creator + admins see it)
- Is the member in the correct organization? (check org switcher)
- Has the member refreshed their browser?
Can't change a member's role
Can't change a member's role
Rules:
- Only Owners can change Admins’ roles
- Only Owners can promote someone to Owner
- Admins can change Member ↔ Admin (but not other Admins)
Organization resources missing after switching orgs
Organization resources missing after switching orgs
Expected behavior: Each organization is completely isolated. When you switch organizations, you see only that organization’s agents, keys, and logs.Fix: Verify you’re in the correct organization via the sidebar organization switcher.
API keys not working
API keys not working
Check:
- Are you an Owner? (only Owners can manage API keys)
- Is the key format correct? (no extra spaces)
- Is the key still valid? (check provider dashboard)
- Are you using the correct key mode? (TalkifAI vs My Keys)
Security Best Practices
Regular Access Reviews
Quarterly review of member list. Remove inactive members and update roles as needed.
API Key Rotation
Rotate API keys every 90 days. Revoke old keys immediately after rotation.
Least Privilege
Give members the minimum role needed. Start with Member, promote only when necessary.
Monitor Activity
Regularly check analytics and call logs for unusual activity patterns.
Next Steps
API Key Management
Create and manage API keys for programmatic access to your organization’s resources.
Create Your First Agent
Build your first voice or text agent for the team.
Analytics
View call logs and usage across your organization.
Team Permissions
Learn about role-based permissions and access control.
Related Documentation
- API Keys — Manage API keys for your organization
- Agent Visibility — Public vs Private vs Commercial
- Team Permissions — Detailed permission matrix
- Analytics — View usage metrics
- Call Logs — Detailed call history