> ## Documentation Index
> Fetch the complete documentation index at: https://docs.talkifai.dev/llms.txt
> Use this file to discover all available pages before exploring further.
# Quick Start
> Create your first AI voice agent in under 5 minutes.
## Prerequisites
All you need to get started:
* A [TalkifAI account](https://studio.talkifai.dev/signup) — free to create
* A **microphone-enabled browser** (Chrome or Edge recommended) — for testing voice agents
\`
When you sign up, TalkifAI automatically creates a **default organization** for you and adds **free trial credits** to your account. No API keys or credit card required to start.
***
## Step 1: Create Your First Agent
In the Studio sidebar, click **Agents → Create Agent**.
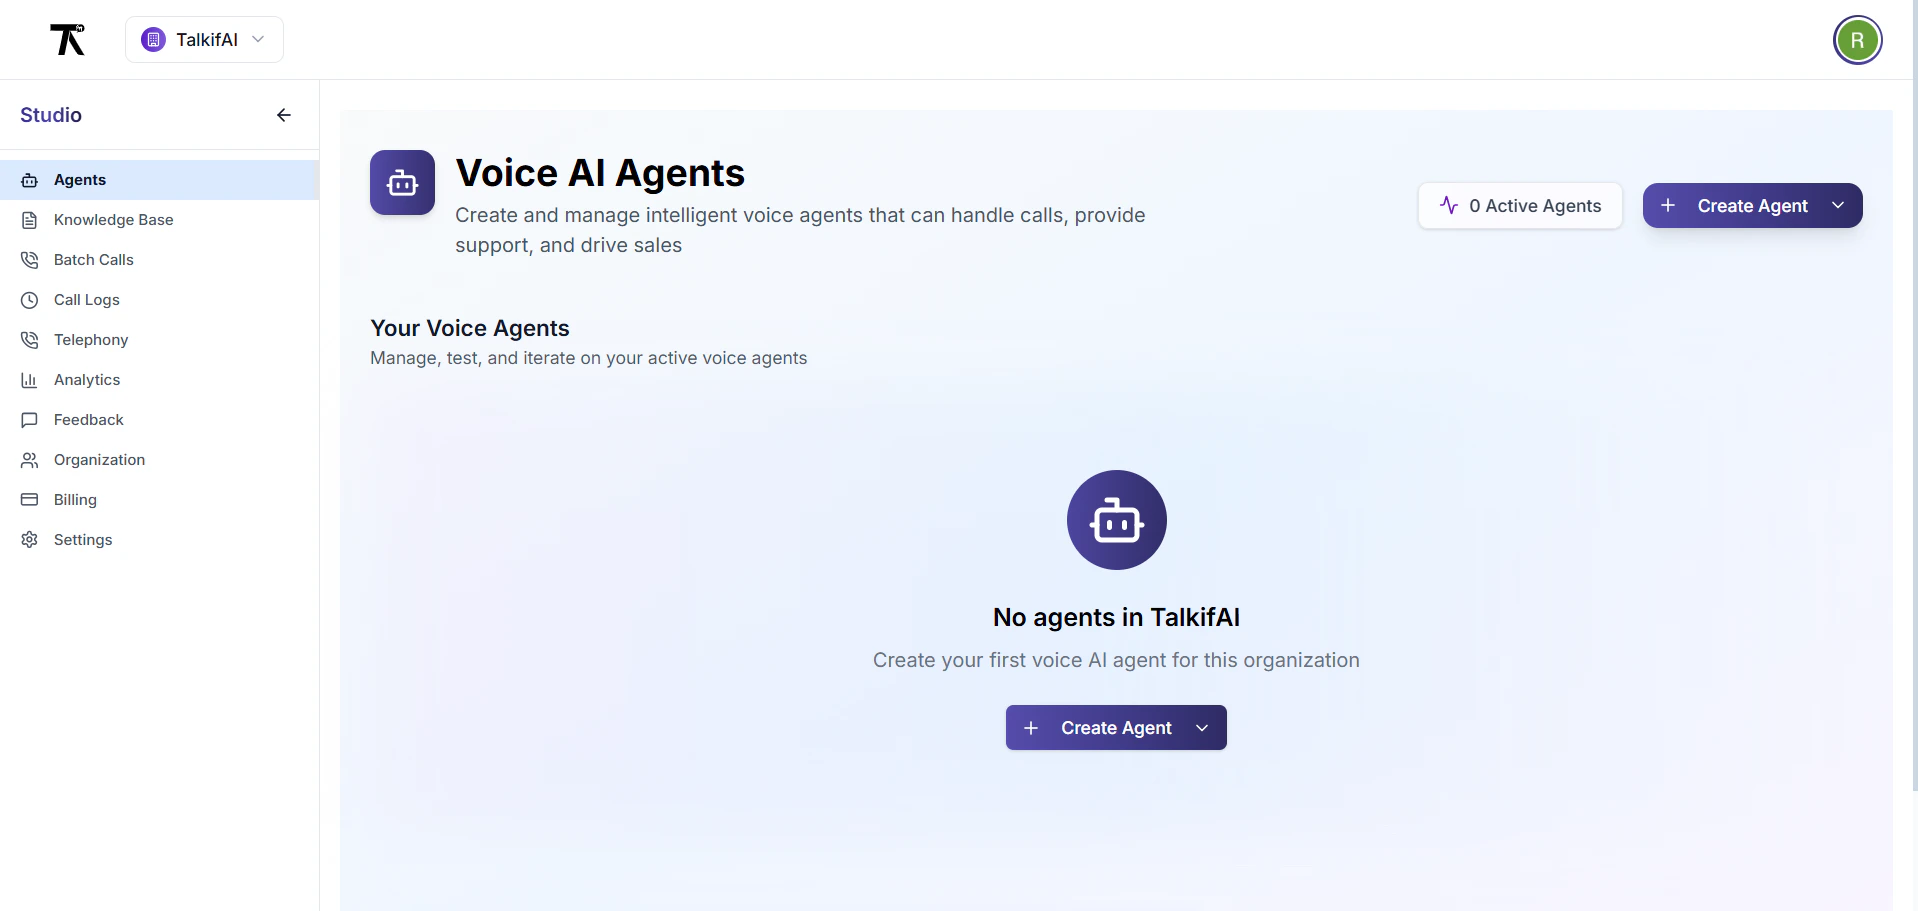 Select the agent type based on what you need:
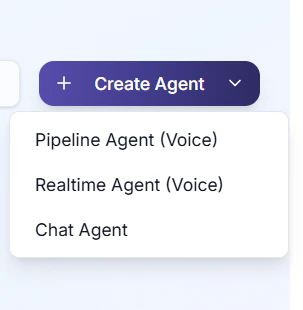 | Type | Best For |
| ------------ | --------------------------------------------------- |
| **Pipeline** | Voice agent — mix-and-match STT, LLM, TTS providers |
| **Realtime** | Voice agent — lowest latency (OpenAI/Gemini native) |
| **Text** | Chat only — website chatbot, no microphone needed |
Not sure? Start with **Pipeline** — it's the most flexible and works great for most use cases.
Fill in the basics:
* **Name**: e.g., "Customer Support Bot"
* **System Prompt**: Instructions for your agent's behavior and personality
* **LLM Model**: GPT-4o, Gemini 1.5 Pro, Claude, etc.
* **Voice**: Choose a TTS voice (Cartesia, ElevenLabs, OpenAI TTS)
* **Language**: Select the spoken language
Click **Test Agent** to start a live voice conversation directly in your browser. No phone number required — your trial credits cover the test session.
Click **Activate** to make the agent live. You can now connect a phone number, embed it as a chat widget, or call it via API.
***
## Step 2: Add Your Own API Keys (Optional)
By default, TalkifAI uses its own platform keys — you don't need to bring your own to get started. When you're ready for production or want full control:
1. Go to **Settings → Provider Keys**
2. Set your **Key Mode**:
* `Platform Keys` — TalkifAI's built-in keys, billed from your credits (default)
* `My Keys` — Your own provider keys, billed directly by the provider
* `Hybrid` — Your keys with platform keys as fallback
3. Enter your provider keys (OpenAI, Google, Deepgram, Cartesia, etc.)
***
## Step 3: Make Your First API Call
Once your agent is active, you can trigger outbound calls programmatically.
### Get Your API Key
1. Go to **Settings → API Keys**
2. Click **Create API Key**
3. Give it a name (e.g., "My First Key")
4. Copy it immediately — it won't be shown again
### Start an Outbound Call
```bash theme={null}
curl -X POST https://api.talkifai.dev/v1/calls \
-H "Authorization: Bearer YOUR_API_KEY" \
-H "Content-Type: application/json" \
-d '{
"agentId": "your-agent-id",
"to": "+12025550123"
}'
```
### Response
```json theme={null}
{
"success": true,
"data": {
"callId": "call_abc123",
"status": "initiating",
"agentId": "your-agent-id",
"to": "+12025550123",
"createdAt": "2024-01-15T10:30:00Z"
}
}
```
To make outbound calls you need a phone number connected to your agent. See [Telephony Setup →](/platform/telephony)
***
## Next Steps
Set up inbound and outbound calling with your carrier.
Give your agent access to your APIs and databases.
Automate outbound calls at scale.
Full REST API reference for developers.
| Type | Best For |
| ------------ | --------------------------------------------------- |
| **Pipeline** | Voice agent — mix-and-match STT, LLM, TTS providers |
| **Realtime** | Voice agent — lowest latency (OpenAI/Gemini native) |
| **Text** | Chat only — website chatbot, no microphone needed |
Not sure? Start with **Pipeline** — it's the most flexible and works great for most use cases.
Fill in the basics:
* **Name**: e.g., "Customer Support Bot"
* **System Prompt**: Instructions for your agent's behavior and personality
* **LLM Model**: GPT-4o, Gemini 1.5 Pro, Claude, etc.
* **Voice**: Choose a TTS voice (Cartesia, ElevenLabs, OpenAI TTS)
* **Language**: Select the spoken language
Click **Test Agent** to start a live voice conversation directly in your browser. No phone number required — your trial credits cover the test session.
Click **Activate** to make the agent live. You can now connect a phone number, embed it as a chat widget, or call it via API.
***
## Step 2: Add Your Own API Keys (Optional)
By default, TalkifAI uses its own platform keys — you don't need to bring your own to get started. When you're ready for production or want full control:
1. Go to **Settings → Provider Keys**
2. Set your **Key Mode**:
* `Platform Keys` — TalkifAI's built-in keys, billed from your credits (default)
* `My Keys` — Your own provider keys, billed directly by the provider
* `Hybrid` — Your keys with platform keys as fallback
3. Enter your provider keys (OpenAI, Google, Deepgram, Cartesia, etc.)
***
## Step 3: Make Your First API Call
Once your agent is active, you can trigger outbound calls programmatically.
### Get Your API Key
1. Go to **Settings → API Keys**
2. Click **Create API Key**
3. Give it a name (e.g., "My First Key")
4. Copy it immediately — it won't be shown again
### Start an Outbound Call
```bash theme={null}
curl -X POST https://api.talkifai.dev/v1/calls \
-H "Authorization: Bearer YOUR_API_KEY" \
-H "Content-Type: application/json" \
-d '{
"agentId": "your-agent-id",
"to": "+12025550123"
}'
```
### Response
```json theme={null}
{
"success": true,
"data": {
"callId": "call_abc123",
"status": "initiating",
"agentId": "your-agent-id",
"to": "+12025550123",
"createdAt": "2024-01-15T10:30:00Z"
}
}
```
To make outbound calls you need a phone number connected to your agent. See [Telephony Setup →](/platform/telephony)
***
## Next Steps
Set up inbound and outbound calling with your carrier.
Give your agent access to your APIs and databases.
Automate outbound calls at scale.
Full REST API reference for developers.